NSOutlineView is a very nice template to create a Finder-like table view of your collection. However, as any other things Cocoa, it is very easy to create UI that looks "standard", but it's not that straight forward to customize it.
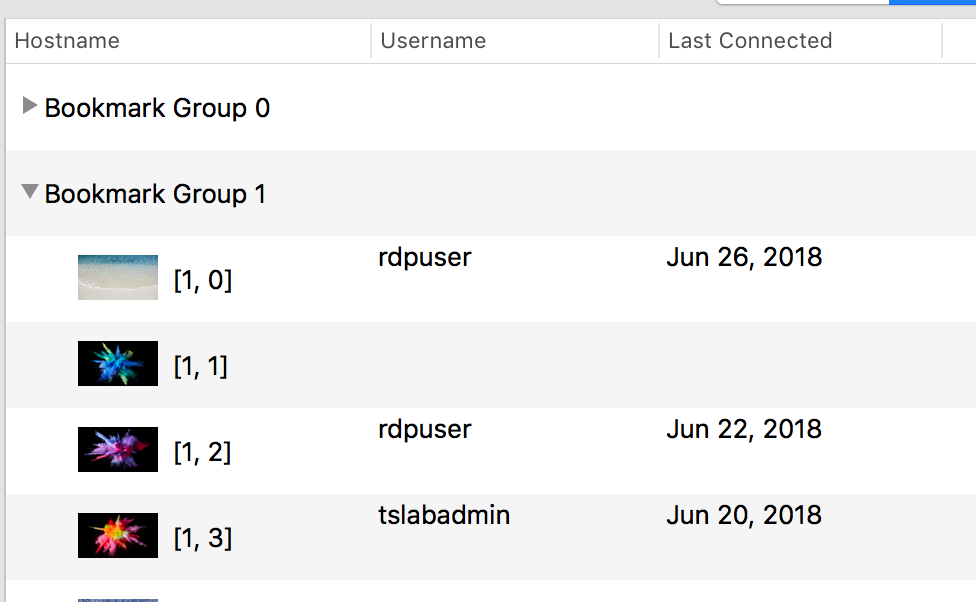
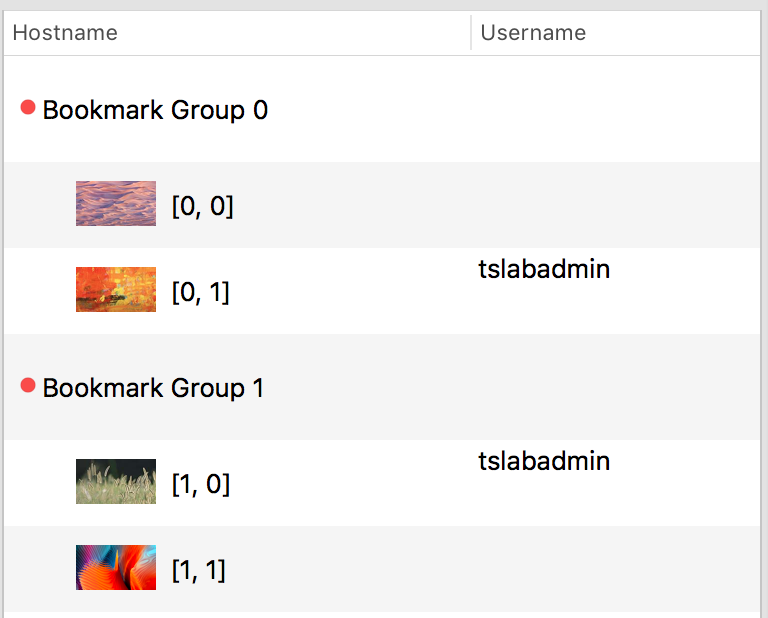
For instance, right out of the box, NSOutlineView already looks like the Finder app, complete with the collapse button (disclosure button is what they call it).
For instance, right out of the box, NSOutlineView already looks like the Finder app, complete with the collapse button (disclosure button is what they call it).
This is great to start with, but now what if I don't like the default triangle disclosure button? What if I want to use my own image for the button? One would think that there must be an image/alternate attribute for the disclosure button or something, but no... there isn't.
So we have to devise a roundabout way to customize the button..
Here's how you can customize the disclosure button
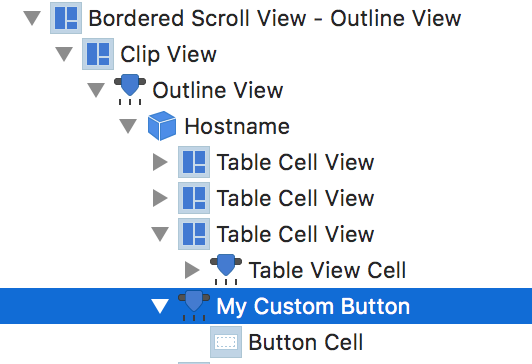
First, we have to add a new button to the expandable column of your outline view, usually the first (left-most) column. In my case, it's the "Hostname" column.
So we have to devise a roundabout way to customize the button..
Here's how you can customize the disclosure button
First, we have to add a new button to the expandable column of your outline view, usually the first (left-most) column. In my case, it's the "Hostname" column.
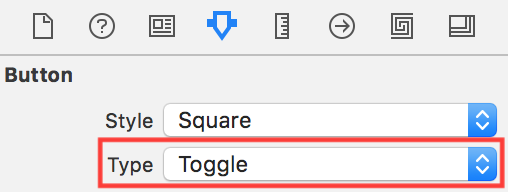
Change the button type to "Toggle"
Put your desired images on these fields:
- Image: The image when the disclosure button is expanded (down arrow)
- Alternate: The image when the disclosure button is closed (right arrow)
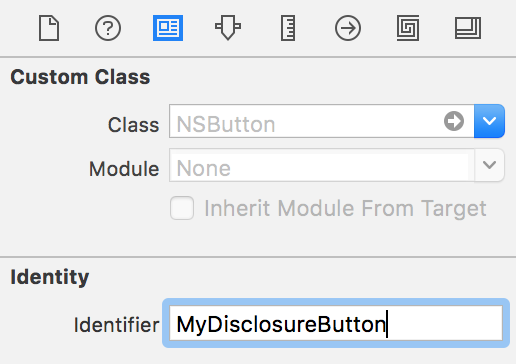
Now, add an identifier to this button so that we can create this button with the identifier. Let's name it as "MyDisclosureButton".
Now, NSOutlineView create its views by calling makeView(), providing the appropriate identifier for each elements on the table. In order to create our own button, we have to subclass NSOutlineView and override this function. When NSOutlineView is about to make the disclosure button, we can intercept this call by checking the identifier that it sent.
Now, NSOutlineView create its views by calling makeView(), providing the appropriate identifier for each elements on the table. In order to create our own button, we have to subclass NSOutlineView and override this function. When NSOutlineView is about to make the disclosure button, we can intercept this call by checking the identifier that it sent.
class GNLOutlineView: NSOutlineView {
  override func makeView(withIdentifier identifier: NSUserInterfaceItemIdentifier, owner: Any?) -> NSView? {

    // intercept disclosure button creation
    if identifier == NSOutlineView.disclosureButtonIdentifier {
      // then create our custom button
      let myView = super.makeView(withIdentifier: NSUserInterfaceItemIdentifier(rawValue: "MyDisclosureButton"), owner: owner) as! NSButton

      // we need to change the identifier so that the outline view knows to use this view as the disclosure button
      myView.identifier = identifier
      return myView
    }

    // for everything else, use the default function
    return super.makeView(withIdentifier: identifier, owner: owner)
  }
}
Change the outline view to use GNLOutlineView as the custom class from the interface builder. When we build and run we should get this:
Great! We can now display custom disclosure button for our outline view!
But wait a second... when we click on our disclosure button, nothing happen! The group doesn't collapse, and the button doesn't change its image. It would seem like we didn't set the target+action properties on our button, so the button doesn't do anything when it's clicked.
Where should we point the target+action of our button to? Let's cheat and take a look at where the original disclosure button's target+action pointed to. After all, they were already working without us explicitly modifying anything, so it must be pointing to the correct target+action!
We can create the original disclosure button by calling the super's implementation of the makeView function
// get the original disclosure button
let originalButton = super.makeView(withIdentifier: identifier, owner: owner) as! NSButton
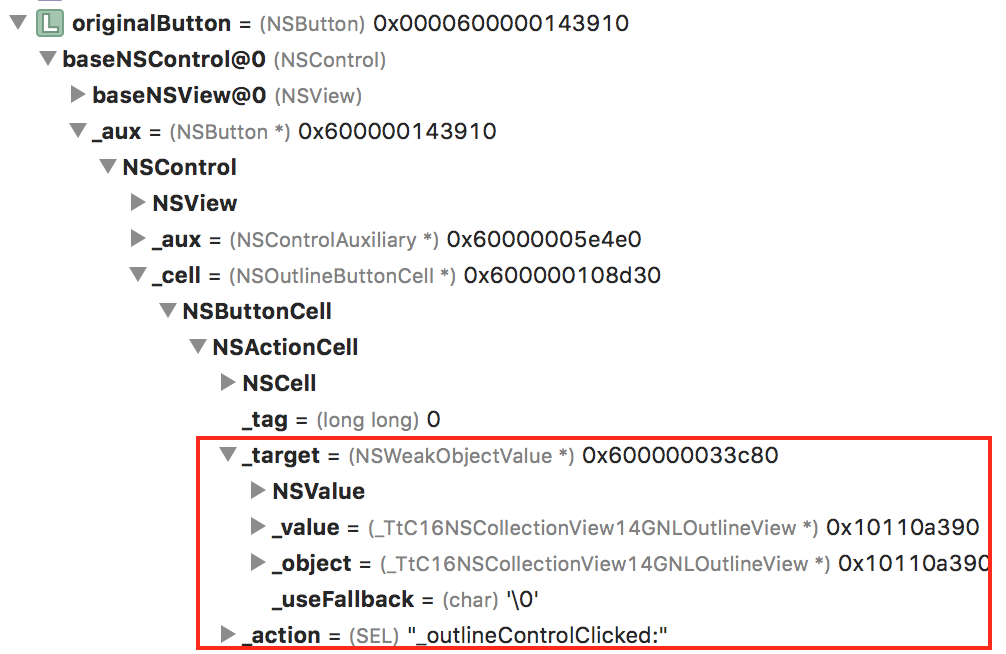
If we stop the debugger after the creation of the original disclosure button, we can inspect the values of the button's target+action (if you drill down enough)
It would appear that the target is just our outline view, but the action is more interesting. The action points to a function called _outlineControlClicked. Since we don't see this function on NSOutlineView AND it starts with an underscore, it is highly likely that it is a private function (an Apple engineer I met at WWDC 2018 told me about the underscore prefixes on private functions and properties).
A simple solution to this is to assign our button's target+action to the target+action of the original button.
A simple solution to this is to assign our button's target+action to the target+action of the original button.
myView.target = originalButton.target
myView.action = originalButton.action
Now, after we hook our button's target+action, we can see that our disclosure button now works perfectly!

 RSS Feed
